Using a cheap, Dollar Store, car solar shade build a double thermal bag.
This is the same concept as some of the MRE meals sold with "built-in cooking bag". But, why pay for a bag you're gonna throw away? Why not just pay for food and keep a reusable bag handy? Here's how I do just that...
1) Go get a really cheap "car solar shield" from somewhere. Mine I think came from the Dollar Tree or Dollar General,
Remember since this is basically a re-hydration method you'll start with more fluid than final cooked food.
3) To make the "cooking bag" make a bag within a bag the size you need. If you look closely I folded some of the inner bag top bag down on itself so there is no raw edge.
When you make your outer bag make it extend above the top
of the inner bag by about 6 inches. Notice I am not measuring
or marking anything, I have to Keep It Simple for Stupid.
Leaving a long outer top allows you to make the "fold lock top".
Just like GL@D sandwich bags...
"Fold one flap in, the other flap over", don't you remember?
(Sorry for you kiddos that grew up in the Zip-L@k generation.)
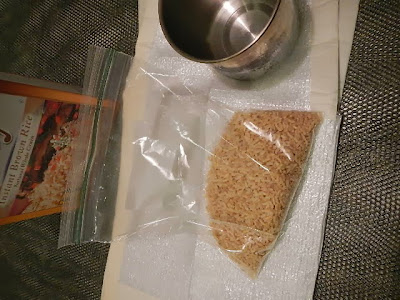
4) In this case I wanted some beef flavored brown rice. So I measured a cup of rice. (It pays to know the volume of the utensils you cook with) and put that with two bouillon cubes in the Zipl@k bag.
Don't forget any salt or other seasoning you add.
5) Now add about a cup of water that just started to boil.
Now's a good time to talk about saving fuel, just start the water
boiling and then pour it in the bag. No need to boil for 5 minutes.
Seal the bag, slide it in the thermal bag, fold lock the top
and in about 15min you have beef flavored brown rice.
Since this is a re-hydration cooking method use "instant" or pre-cooked
base foods to build on.
Here's your' time savings, no sitting and stirring.
Just put it in the bag and go take care of some other camp chore. Or NOT!
6) Last important step...
Since there are no cooking utensils involved, please dispose of the
Zipl@k bag correctly or pack it out.
Hope you enjoyed this little trick. I'll try and video some eggs in the orange shell the next time I'm out just to show off that neat little bit of cooking.
AS ALWAYS...
Get outside, go adventure, and be safe!


No comments:
Post a Comment
Thanks for visiting, please share with others.